
I recently talked about how after nearly a decade of being a loyal consumer of Aweber, I decided to make a switch and migrate to MailChimp. Now let’s talk about how I switched from Aweber to MailChimp.
Note this will obviously only be specifically applicable if you’re making the same switch, but it’s good guidelines to describe the process if you’re making an email list provider change in general.
How to Switch From Aweber to MailChimp
Exporting/Importing Your Email Subscriber List
The first and most important step when making the switch from Aweber to MailChimp (or any provider for that matter) is to ensure that your subscriber list migrates seamlessly with you. You’ve gone through the trouble of building this list over the course of your time with your previous client so you want to be able to just plug your existing subscriber list(s) into your new email marketing client.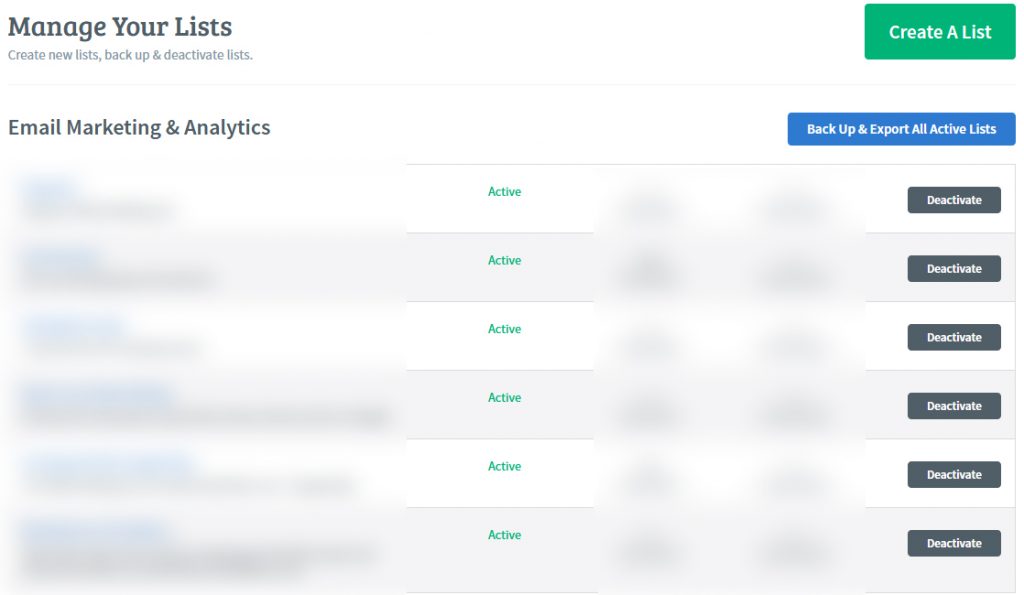
Fortunately this is the easiest part of migrating from Aweber to MailChimp. Aweber makes it simple to export your entire list to a single zipped folder which includes both all of the relevant information for the subscriber you got when they first subscribed with your old client as well as all of your broadcast (one off) and autoresponder emails (in both HTML and text formats). Note that this will encompass all of your lists at once rather than having to do it for each individual list.
Simply go to the “Manage Lists” tab at the top of your account in Aweber and select “Back Up and Export All Active Lists”. You’ll then be prompted to give an email address to deliver the information in a zipped folder and that’s that.
Then, on the MailChimp side, you locate and select the list you want to import subscribers for (or create the list if you haven’t already) and select “Add contacts”. They’ll give you an option to import via CSV or TXT files, copy and paste via XLS, or import seamlessly using their import interface if the client you’re importing from is one which is integrated with MailChimp such as Constant Contact, SalesForce, etc.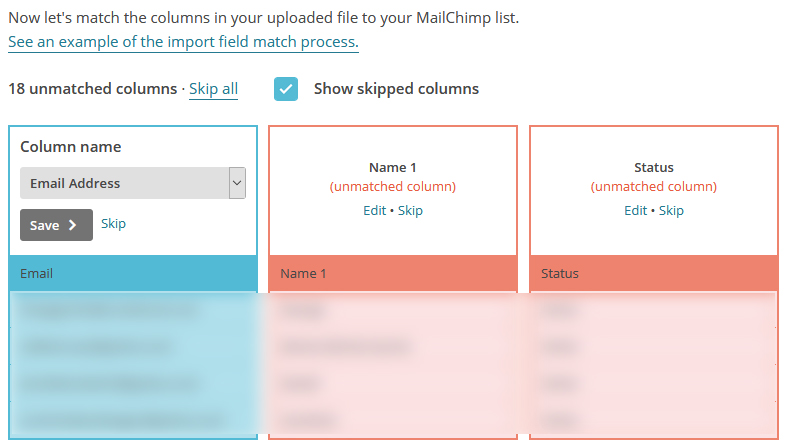
Aweber wasn’t integrated, so I just went ahead using the steps I listed above then imported via CSV. Regardless of which email marketing provider you’re importing from, if you use this method you’ll see something like this:
MailChimp will recognize some of the columns from your CSV such as the email address, but if it doesn’t then you can designate how MailChimp should classify them such as “First Name”, “Last Name”, etc.
MailChimp has default categories for IP address signed up through, sign up date, and others, but you can add custom categories which your previous client offered. In my case, Aweber noted which city someone signed up in for example, so I could create a new category for the information of column when importing called “city”.
I could even retain the nitty gritty but important details like the pages which someone signed up on to maintain my analytics.
This will help you later when you want to break up and better sort your contacts so no data is lost in the transition.
Once you’ve finished assigning all of the relevant data, your contact list has now been transferred successfully.
Exporting/Importing Your Autoresponder Series
Your autoresponder/followup series is right behind importing your subscriber list in terms of importance. Just like you put a lot of work into gaining your subscribers over the years, you’ve likely put a lot of time into split testing and consequently perfecting your autoresponder emails.
Unfortunately there’s no instant import in MailChimp to bring in your emails with one button click simplicity. Instead you simply have to copy and paste the text or the HTML format of each email in each series. This can take anywhere from a few minutes to an hour, depending on how many series and how many emails you’re importing, but at least you know not a single aspect of the emails will be any different when new subscribers join your list.
MailChimp lets you save a template, as well, so because I rarely change my basic template style I like to design an email from the ground up, save it, then just swap out my content for each subsequent one-off email or autoresponder email I send out. Doing this I was able to copy, paste, and ultimately maintain the same style for an autoresponder series I had with Aweber in roughly 5 minutes.
Exporting/Importing Your Sign Up/Opt-In Template
Importing templates is an entirely different animal and because virtually every email marketing company uses different code, this can be tricky. What’s more is that MailChimp doesn’t give a lot of pre-existing template options for sign up forms. The basic templates they give you are less templates and more adaptable canvasses.
Ultimately my solution wasn’t too far off what I did with Aweber, but I did more of it in WordPress and less in MailChimp.
What I’m referring to is pairing an image widget with an HTML widget.
The image was the same image I created and used for my sign-up form with Aweber which detailed my list/autoresponder a visitor would be signing up for.
The HTML was simply the HTML I got direct from MailChimp which was tied to my corresponding list.
Fortunately WordPress and Drupal are both relatively user friendly and simple nowadays, so it’s not difficult to pair images with HTML self-contained virtually anywhere you want it on your website.
In the case of ConvertingCopy.com, it’s just on the right hand widget. It’s just as visible as it always was and visually little changed in the sign up form itself even after technically separating them.
How to Switch From Aweber to MailChimp
After you have successfully imported your subscriber list(s), imported your autoresponder series, and gotten your opt-in forms sorted, your migration from Aweber to MailChimp should be complete. If you have any more specific questions, please email me at paul@convertingcopy.com and I’ll be happy to field them.
Also make sure you check out my eBook “The Complete Email Marketing Blueprint” for complete coverage on all things email marketing.