
Whether you’re a self help guru, a fictional novelist, or just have a digital product in the form of an eBook, the Kindle Store should be at the top of your list when it comes time to publish. The Amazon Kindle Store has one million plus books available on all topics from thousands of authors which range from your New York Times Best Sellers to your first time novelists. Let’s talk about how to get your book in the Kindle store.
How to Get Your Book in the Kindle Store
It’s the largest bookstore whether that’s online or offline, hence the importance of publishing your book to it. And the best part is that you don’t need a publishing contract, an agent, or even any money to get your book potentially in front of the eyes of millions of customers. To reiterate that last point, it’s a common misconception that it costs anything to publish your content to the Kindle store. They’ll take a percentage of each sale, but that’s how they afford to keep your book in their store.
A quick note: if you have an info product which you can sell on a merchant affiliate program like DigiResults, you should publish it there, as well, as you get a lot more control over things like price and extra affiliate help, not to mention you can claim a much larger piece for yourself with every sale.
Still, nothing can compete with the Kindle Store’s reach. Just earlier this year I published my Complete Online Marketing Bible – 2014 Edition to the Amazon/Kindle store, and it was quick, painless, and free.
Here is my step by step guide on how to get your book in the Kindle Store.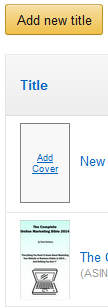
Step One – Go to the Kindle Direct Publishing page on Amazon. You can sign in using your existing Amazon account. I’m assuming you already have one, but if you don’t, it’s pretty straightforward; just sign up using your email address.
Step Two – Click “Add New Title” button. You’ll be prompted to input some basic info on your book, including its name/subtitle, edition number, publisher (if applicable), a description, the language it’s in, publication date, author(s), ISBN number, categories, keywords, age range, etc. You’ll also be prompted to upload a cover photo for the cover of the book which you can include yourself or create using their free cover creator.
You’ll also be prompted to select whether you want to enable “digital rights management” or not. 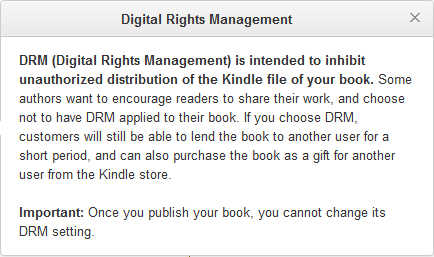 If you enable this, it will be more difficult for people to share your book. If you don’t enable it, this means you’re encouraging people to share your work. If you’re just trying to build a name for yourself with your first book, or you have included links in your book which benefit you by generating traffic to a website and don’t care about money (at least in terms of selling your book) then you have more motivation to encourage people to share your book.
Step Three – Once you have all of these options chosen, it’s time to upload your digital format book. Select “browse” under the “upload your book file” section and find the file on your hard drive. There are a number of file formats which are accepted ranging from Word/Doc files to PDF to HTML files. While PDF is a one stop solution, it will likely upload incorrectly and you’ll likely have a lot more formatting to do. I prefer a Word file which makes making changes easier and quicker.
Step Four – After you have uploaded and viewed your book as it will appear on a Kindle/eReader and edited it accordingly, you can move ahead to the next step which involves pricing and release options. First you choose where you hold the rights for the product, most likely you’ll have “worldwide rights” so this isn’t an issue, otherwise you can choose specific countries where you hold the rights.
Next you need to set your price and royalty option. The price can be whatever you want it, check out my new product pricing strategies for more information.
Kindle Pricing – 35% Versus 70% Royalty
 Amazon gives you a choice of receiving either 35% or 70% royalty per each copy sold, and they’ll take the rest. It may seem obvious you should take the 70% if you don’t know the difference between the two options, but you might actually be making less if you choose 70% because of what goes into it, depending on your book, so let me explain the difference.
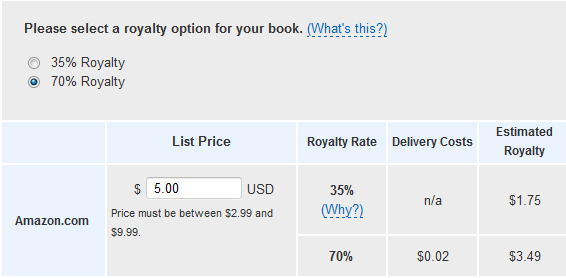
The main difference with the 35% is that Amazon covers all of the delivery expenses. Different books have different delivery costs associated with them depending on the size of the file of the book. What really increases the size of a book’s file is if you have a lot of images within it, particularly high quality/larger images. Amazon charges more to deliver a book which is a larger file because it costs more of their bandwidth to send that file to someone’s Kindle when they buy it.
The verdict: choose 70% if your book has relatively few images and choose 35% if it has a lot of images. If you’re not sure, enter the price you want to charge, then choose the 70% royalty radio button (see image) and Amazon will calculate the delivery charges and show you which will yield a better royalty. In most cases, 70% will be the winner, particularly considering most books don’t go beyond a megabyte in size. Also note that you can only choose the 70% royalty option if your price is between $2.99 and $9.99. If it falls on either side, you’re limited to 35%.
Kindle MatchBook
After you’ve sorted your pricing out, you can enroll in the MatchBook program by ticking the box. This just means that if you have a print version of the digital book you’re publishing and the person who is about to purchase your digital version has already bought the print version via Amazon, then you can go ahead and offer the digital version at a much discounted price as a courtesy.
Kindle Book Lending
Lastly, you have the option to “allow lending for this book” by ticking the Kindle Book Lending radio button. This just means that if you tick that button, anyone who buys your digital book via the Kindle Store will be able to send your book to other Kindle users like their friends and family members and those users have free access to your book for 14 days, after which it will disappear from their Kindle. Just like the digital rights management option, this is great if you just want to get the content out there and aren’t concerned about income via the digital book itself.
Once you choose these last two options, you can save your options and publish your book right then and there and you’ll have a product page on Amazon which you can link to or create affiliate links if you have marketers working for you.
And that’s it; it takes about 10 minutes to get your book up and published in the Kindle store.